Imagine yourself driving your car on a lazy afternoon. You’re feeling great and the weather is good. However, you suddenly begin feeling a lot of vibrations in your steering wheel.
Then, you begin hearing weird noises coming from the front end of your car. Well, if that happens, don’t worry. The problem might simply be your inner tie rods.
Fortunately, it isn’t that hard to replace it.
Keep in mind that steering is a vital part of any car. If you can’t steer, then you obviously can’t drive the car as well.
Also, you should know that each time you utilize your steering wheel, you are also engaging the tie rods on your truck or vehicle.
Whether you are going straight, turning left, or right, the tie rods help you stay in control of your car.
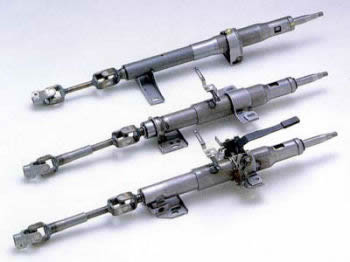
1 What is a Tie Rod?
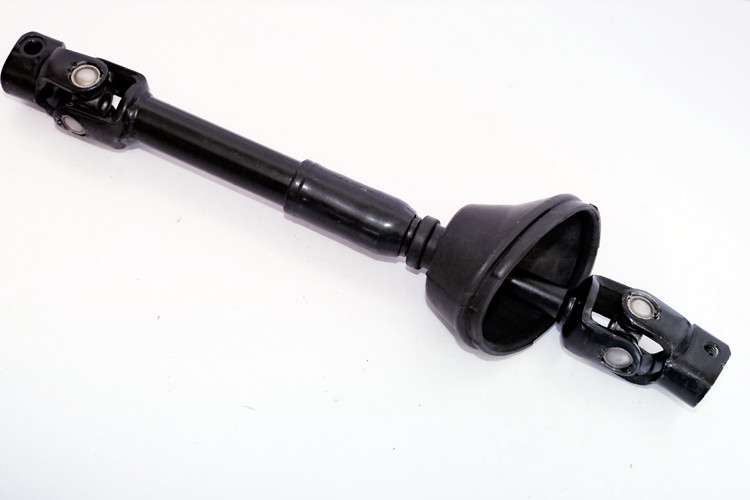
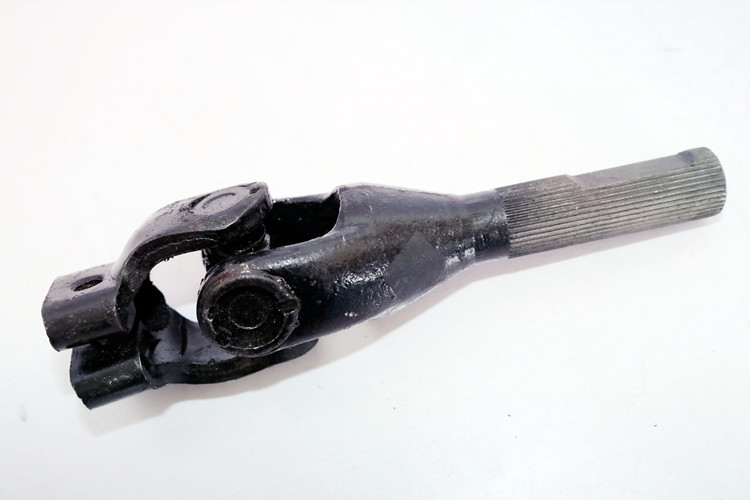
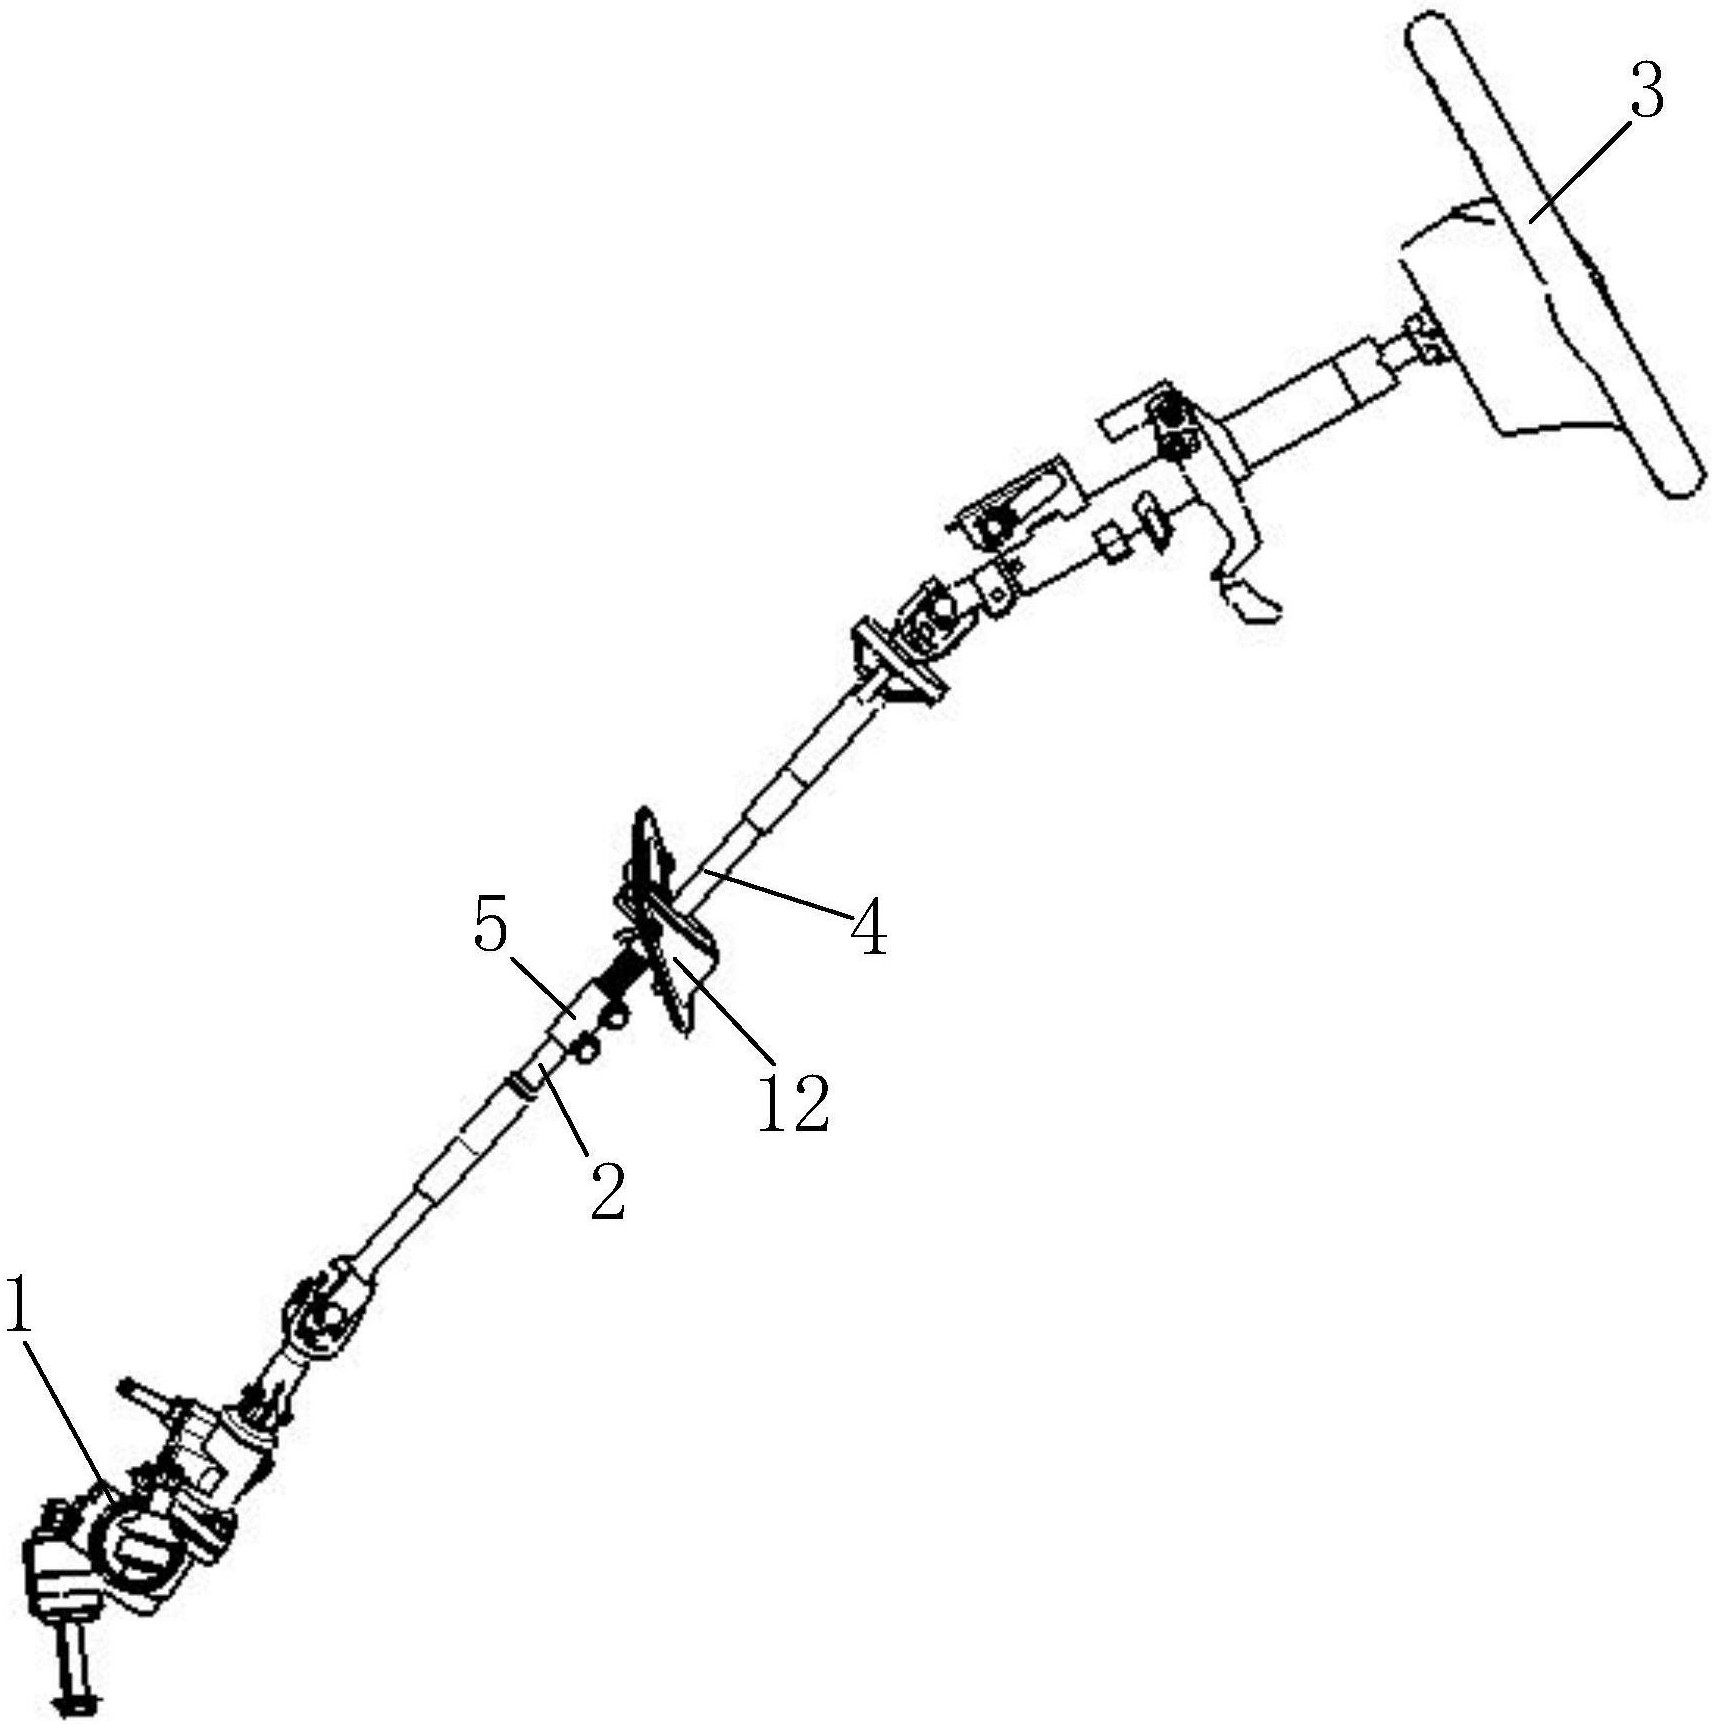
For those who don’t know, a tie rod is a component that connects the steering knuckle of the vehicle to the steering rack inner joint on the front wheel.
The inner and outer ends of the tie rod surround an adjusting sleeve. Whenever you rotate your steering wheel, it encourages movement across the entire mechanism.
The rods push or pull the wheel and make it turn.
Because you will find it almost impossible to drive your car if you cannot turn the steering wheel, it does not take long to know simply how crucial the maintenance of your tie rods can be.
You should also know that tie rods contain vital components. This includes:
- A threaded bolt that connects the steering knuckle to the tie rod
- The bearing casing that is connected to the inner tie rod body, which is all encased in a rubber dust boot
- A tie rod includes bushing to protect the internal parts from grit and debris
- Almost every tie rod also includes a grease mounting. This allows the bearings to easily rotate without any friction
- It also includes the shaft’s body that transmits movements into the ball stud whenever you drive
- The rounded part contains a couple of bearings that offer you the ability to steer even if you are driving your car on a rough road

2 What Happens if the Tie Rod Breaks?
You probably don’t want to drive your car on a busy road if you don’t have insurance, right? Similarly, you should not attempt to drive your car if it has a damaged tie rod.
Fortunately for you, there is a speedy assessment you can do to determine if your tie rods are deteriorating. This will help you guarantee that you do not end up stranded in the middle of nowhere with a broken tie rod.
First of all, you’ll have to jack up the front of your vehicle. After you have properly elevated the wheel, position your hands at 3 o’clock and 9 o’clock. Then, push your hands right and left on either side.
You will want to take another look if you notice any play or slop. If the wheel is still jacked up, try to remove the wheel and inspect the mechanism beneath it.
You should be able to find the tie rod at the back brake rotor and hub. This will help you conduct a visual assessment of the damage.
A torn bushing is a sign that something like grit or road debris accumulated and corroded it. This will need a complete replacement.
If the bushings are still in excellent condition, take hold of the outer tie rod and shake it to see if it vibrates. You have to replace the tie rods if they sway side to side.

3 How Do You Properly Inspect a Tie Rod End?
Unless you’re extremely knowledgeable about automotive components, it is typically a good move to hire a professional mechanic to check your tie rods for safe use.
Tie rods can show indications of “free play” or “slack” when pushing down or up on the tie rod. This is an indication that the tie rod is failing and you need to replace it.
Another way to inspect the tie rods is to raise the car and get rid of the front wheels. Make sure you turn the wheels to the right to check the passenger-side tie rod end.
Then, you’ll have to turn the wheels to the left to check the driver’s-side inner end. You need to replace the tie rod if they show excessive wear, leaks, or tears.

4 Common Indications of a Failing Tie Rod
There are a couple of warning indications that you need to look for in your tie rod to determine if you need to replace them.
If you notice at least one of the symptoms below, it is a wise move to take your car to the nearest auto mechanic.
1) Delayed Steering Response
Nowadays, the steering of cars is usually electrically assisted. The biggest benefit of this is its fast response whenever you turn the steering wheel.
Unfortunately, failing tie rod ends will cause the steering wheel to loosen and increase idle travel in the system.
A couple of delays are fine. However, it should not exceed five inches. It’s a tie rod failure if the wheels turn a lot later when you turn the steering wheel.
2) Bad Alignment or Car Pulls
If your car appears to drift or pull to one side, you might have a problem with your tie rods and the steering rack ball joint. If the tie rods aren’t in excellent shape, they might fail to keep your car aligned properly.
Alignments can’t be done properly with failing, loose, or worn tie rods.
3) Uneven Wear of the Tires
If these are worn or loose for a long period, they could affect the wear patterns on the car’s tires.
As mentioned above, failing, loose, or worn tie rods would result in your car going out of alignment. The reason for this is that your tires will toe out.
Whenever you drive your car with toed-out tires, this would result in the interior tire treads deteriorating faster over time.
Tie rods themselves don’t directly cause tire wear. However, they have a major influence on the alignment of your car.
4) Shaky Steering Wheel
On a lot of occasions, the first indication that a tie rod is bad is simply a shaky steering wheel. This occurs because the steering wheel is starting to lose control of the wheels.
The steering might not be responsive or have slack. You will notice this problem more when you try to turn the wheels.

5 Why Do Tie Rods Fail?
There are a lot of reasons why tie rods fail. Usually, they can deteriorate due to harsh road conditions and regular deterioration.
Most of the time, the reason for tie rod failure is the absence of proper lubrication. Road hazards such as hitting the curb bumps in the road, and potholes can also shorten the lifespan of the tie rods.
These hazards on the road can break the tie rods. They often result in leaks as well. If this happens, the tie rod end can bind up and loosen. This makes it dangerous to drive your car.

6 How to Change Inner Tie Rods?
Step 1
The first step in changing your inner tie rods is to raise your car. You can use jack stands to do this and support the car as well.
Then, use a 1/2-inch socket and air gun to get rid of the wheels. Next, use a wire cutter to get rid of the cotter pin from the outer tie rod stud. Use a wrench to get rid of the nut from the outer tie rod.
Step 2
The next step is to use a wrench to undo the nut lock on the shaft of the outer tie rod. Then, get rid of the tie rod from the spindle.
You’ll need a tie rod separator for this. You can do this by inserting the separator tool’s forked end in between the tie rod and the spindle.
Use a hammer to smack the tool until the outer tie rod loosens inside the spindle’s tapered hole. Remove the tie rod from the spindle by lifting it.
Step 3
To get rid of the outer tie rod from the shaft, rotate it counterclockwise. Make sure you memorize the number of rotations you need to get rid of the rod from the shaft since you’ll need to remember it when you need to install the rod again.
It’s best to take note of how many turns you need. You will have to install the tie-rod end on your brand-new shaft with a similar number of rotations to ensure proper alignment.
Step 4
Use the wire cutters to get rid of the boot of the inner end. Make sure you also cut and twist the clamp that is holding the tie rod in place.
Next, pull off the boot from the shaft. Then, insert the correct end of the remover into the remover tool. Screw off the inner tie rod from the rack using the inner tie rod remover.
Step 5
Screw the brand-new inner tie rod on the rack to install it. You can use your hands for this. Make sure you screw it as much as you can. Then, rotate the inner clockwise until it fits with the inner tie rod remover tool.
Step 6
Next, shove the boot of the inner tie rod. Then, put the big clamp around the boot’s inner part where it fits into the rack. To hold in place, utilize the wire cutters to squeeze the clamp’s end.
Step 7
Operate the nut lock on the shaft of the tie rod. Then, screw it up above the middle of the thread.
As mentioned earlier, you need to take note of the number of turns you need to remove the rod from the shaft. Now, you need to fasten the outer tie rod on for the number of rotations similar to what you recorded.
Attach the tie rod into the spindle’s hole. Use a wrench to screw the nut on and fasten it. Next, attach the cotter pin and use a wrench to fasten the nut lock against the outer tie rod end.
Step 8
Use the ½-inch socket and air gun to install back the wheels.

7 Things to Consider When Replacing Inner Tie Rods
When you’re installing new components, there are a couple of things you need to be wary of.
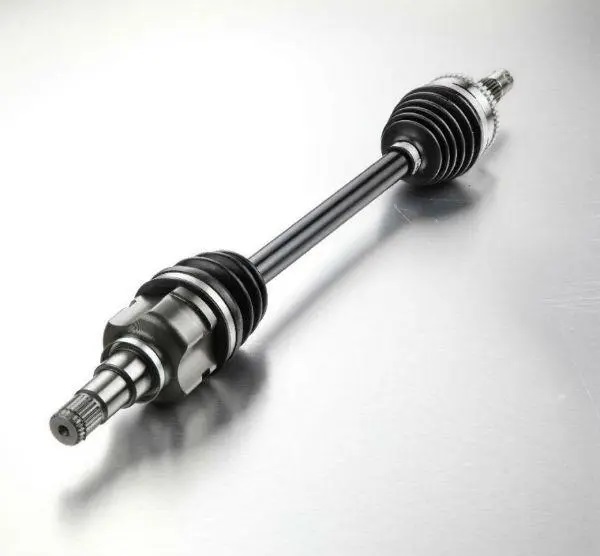
- It’s a wise move to clean up and check the area and surrounding components while you are working under your car. This is an excellent time to look at the CV axles and ball joints.
- You might have to replace the clamps on the dust boot if they’re one-time use.
- Make sure you use thread sealer to the new tie rod end where it connects to the steering rack inner joint.
- You will also have to tighten the castle nut to a torque specified by the manufacturer.
- When tightening the connecting nut between the outer and inner tie rods, you will need a torque wrench.
- Check your new components to ensure they’re the same size. If they are not, but they’re the right components for your car, you might need to adapt the length to fit properly.
If so, you’ve got to compare the size and rotations of the original components to match them up with the new components.

8 Do You Need to Replace Tie Rods Simultaneously?
Though it might not be really essential to replace the two tie rods together, a lot of professionals might suggest various combinations of replacement components.
If you’re planning to change the inner tie rod, you might have to change the outer tie rod as well.
The reason for this is that you’ll have to remove the outer tie rod if you want to change the inner tie rod.
Having both the outer and inner tie rods replaced together helps you save some money. You can also avoid any issues down the line if you replace both parts.
On the other hand, if the outer tie rod is failing, but the inner tie rod is always still in excellent shape, you won’t need to replace both parts.
If both the inner and outer tie rods have similar mileage, they likely have the same amount of deterioration.
If the looks of the tie rods indicate corrosion or some kind of deterioration, it is likely a wise move to fully replace them.
Because you will require some kind of alignment for you to be able to configure the tie rod and the steering rack ball joint properly, replacing all broken tie rods is necessary before proper alignment. The reason for this is that proper alignment can’t be done if you always suffer from a failing tie rod.

9 How To Avoid Tie Rod Problems
It’s vital to maintain your car regularly if you want to avoid tie rod issues. Doing so will help you avoid any surprises down the line.
Whenever you change your oil, ensure you clean off and grease the ends of the tie rods to get rid of debris and increase their lifespan.
The possibility of you replacing the tie rods at some point throughout the lifespan of your vehicle is high.
However, if you perform routine maintenance by lubricating and cleaning the tie rods on your car, you can make these parts last for a longer period. Aside from that, you can also avoid emergencies on the road.
10 Do You Need a Mechanic?
Even though you call yourself a DIY expert, you probably don’t have the right tools, workspace, spare time, or knowledge to tackle major car repairs.
Oftentimes, you simply need a reliable auto mechanic to help you repair your car. This is particularly true when it comes to replacing the inner tie rods.
Hiring a reliable car mechanic is vital if you want to guarantee the successful installation of your new inner tie rods.
In addition to replacing your inner tie rods properly, a professional car mechanic can also help:
- Identify other problems with your car
- Have detailed knowledge of different car components
- Offer professional inspection of cars
However, how much does it cost to replace your inner tie rods? Well, you should expect to pay around $70 to $250. This price includes the replacement components and the labor fee.
However, it’s always a wise move to prepare more money in case your mechanic will find other hidden problems in your car.
As much as possible, it’s best to let the mechanic fix all of the issues of your car at once to help you save money on labor fees.
The Previous Articles:
What Is Rack and Pinion Bushing? How To Tell If Rack and Pinion Bushings Are Bad?
Why Steering Rack Makes Noise When Turning?
How To Rebuild A Steering Rack?
What Is A Rotary Valve Power Steering Rack?
Rack And Pinion System Vs Power Steering System: What Are The Differences?
Power Steering Rack Market Analysis Report (Japan Market)
What Causes Steering Rack to Go Bad?
Design Of Car Rack And Pinion Steering Racks
What Is The Intelligent Steering Rack Used By VW, Toyota, Honda And Renault?
Leave A Comment